In this post I’m going to try to explain what Jenkins is, why we use it, how to install it in Debain and how to use it. Everyone is going to say… oh no! Another boring post about it. I’ll tell them just maybe or maybe not. Find out for yourself.
Firstly, I have to say this post is all my notes about my research about Jenkins, therefore, it could be a bit different than other websites, or just wrong! So if you see something wrong, just tell me about it. What’s Jenkins?
For me, Jenkins is a web application which offers an easy way to do a continuous integration or continuous delivery in different technologies.
I think most people who search about these terms knows about Jenkins, but I’m going to explain it too in a few words. Continuous Integration, CI, is the process of automating the building and testing of the code every time the team upload the code to the control repository. Continuous Delivery, CD, is the process which builds, tests, configures and deploys from a test to a production environment.
I think explaining these terms you can see why we use it. I’m really interested in working with it, because I think you can have more control in the product which we are developing. Because I’m using it now in my work, but I think we’re not using it correctly, but that is another matter. Installing Jenkins on Debian 9
There are a few ways to install it (Docker, War and apt). For these things I’m a bit weird, and I prefer to install it via apt. Well the first thing I have to say is log in with root user and add the key of the package repository:
wget -q -O - https://pkg.jenkins.io/debian/jenkins.io.key | apt-key add -
Now we have to add the package repository in the source list, there are two ways, so choose whichever you want. I’m going to use the first one.
sh -c 'echo deb http://pkg.jenkins.io/debian-stable binary/ > /etc/apt/sources.list.d/jenkins.list'
For the second one, we need to create and add the next line in “/etc/apt/sources.list.d/jenkins.list” :
deb https://pkg.jenkins.io/debian binary/
Now it’s time to update the apt, so you need to execute the next command and install the package.
apt-get update && apt-get install jenkins
There you have it. Enjoy your Jenkins. But don’t leave here yet. There’s more. I guess everyone has a Tomcat in the server or something in the 8080 port, so you must to go to the Jenkins conf file which is in “/etc/default/jenkins” and go to line 63, in that line you can configure the port, so change it. I usually use weird ports like 6669, or something like that. After that, you need to restart the service, so run the next command:
/etc/init.d/jenkins restart
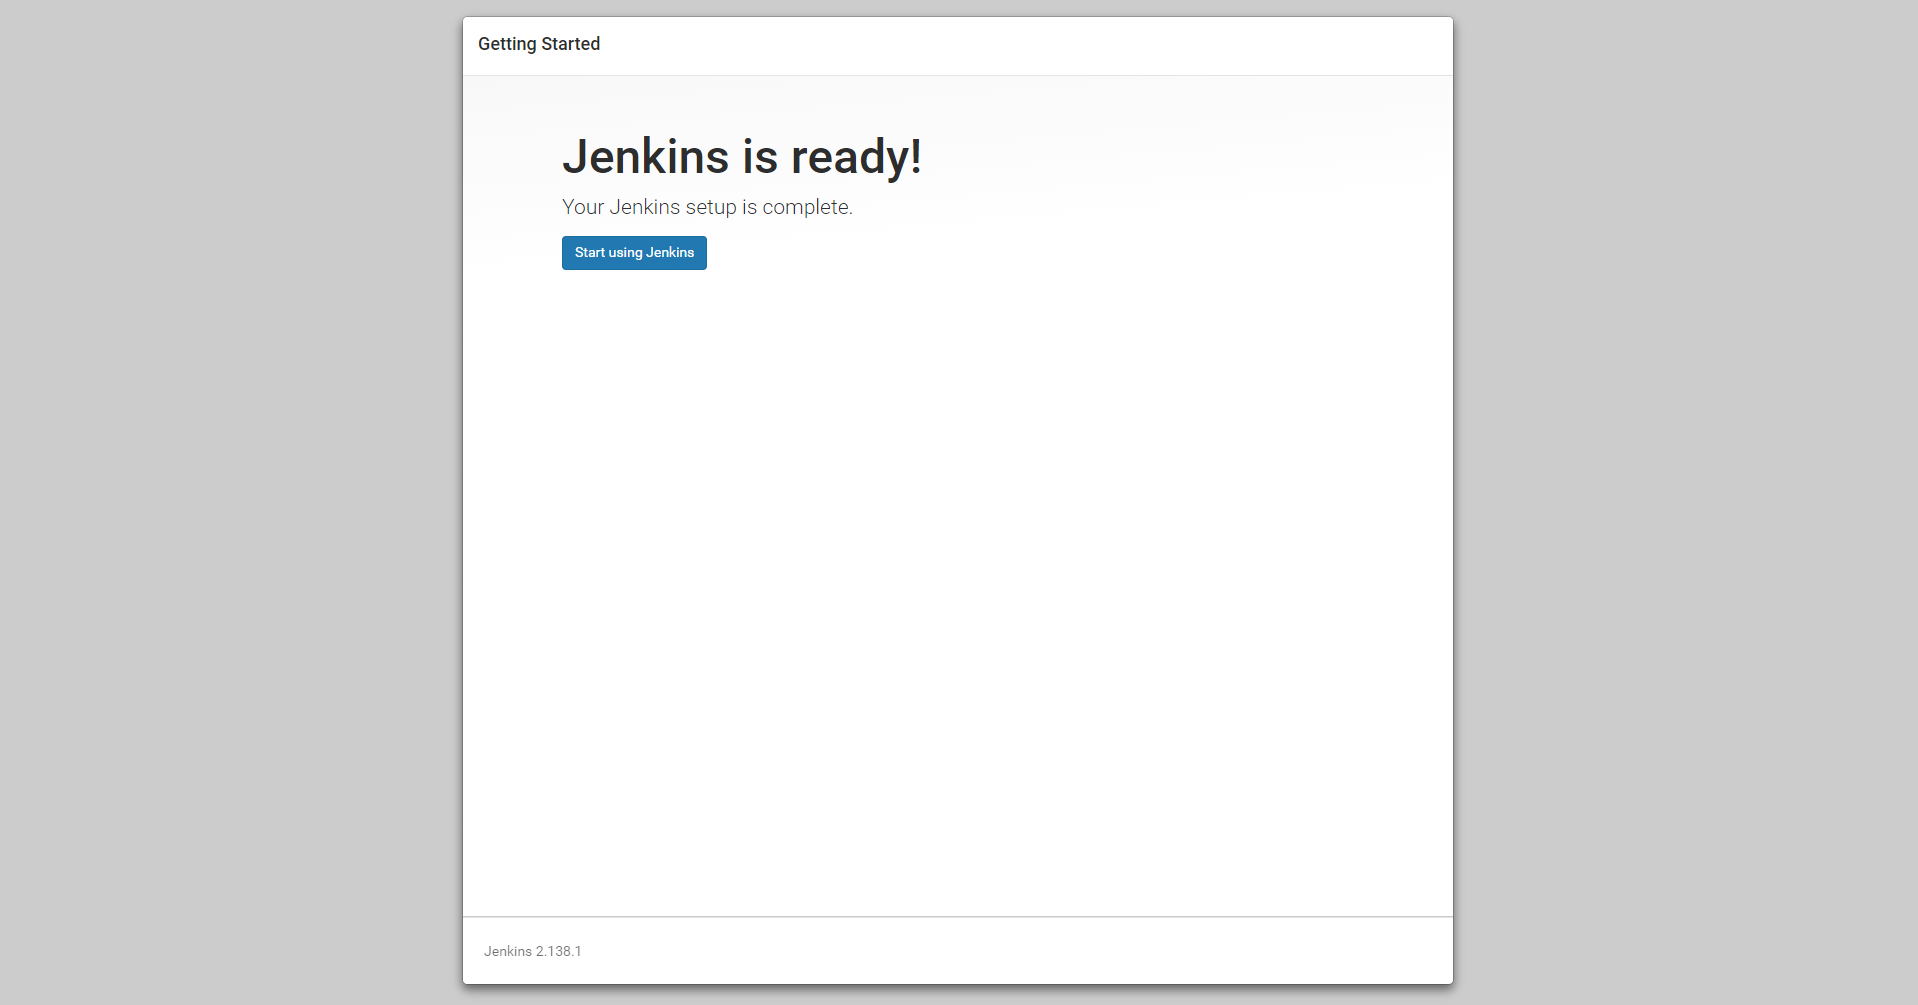
When you’ve got it, open a browser and go to the Jenkins. You’ll have something like that:
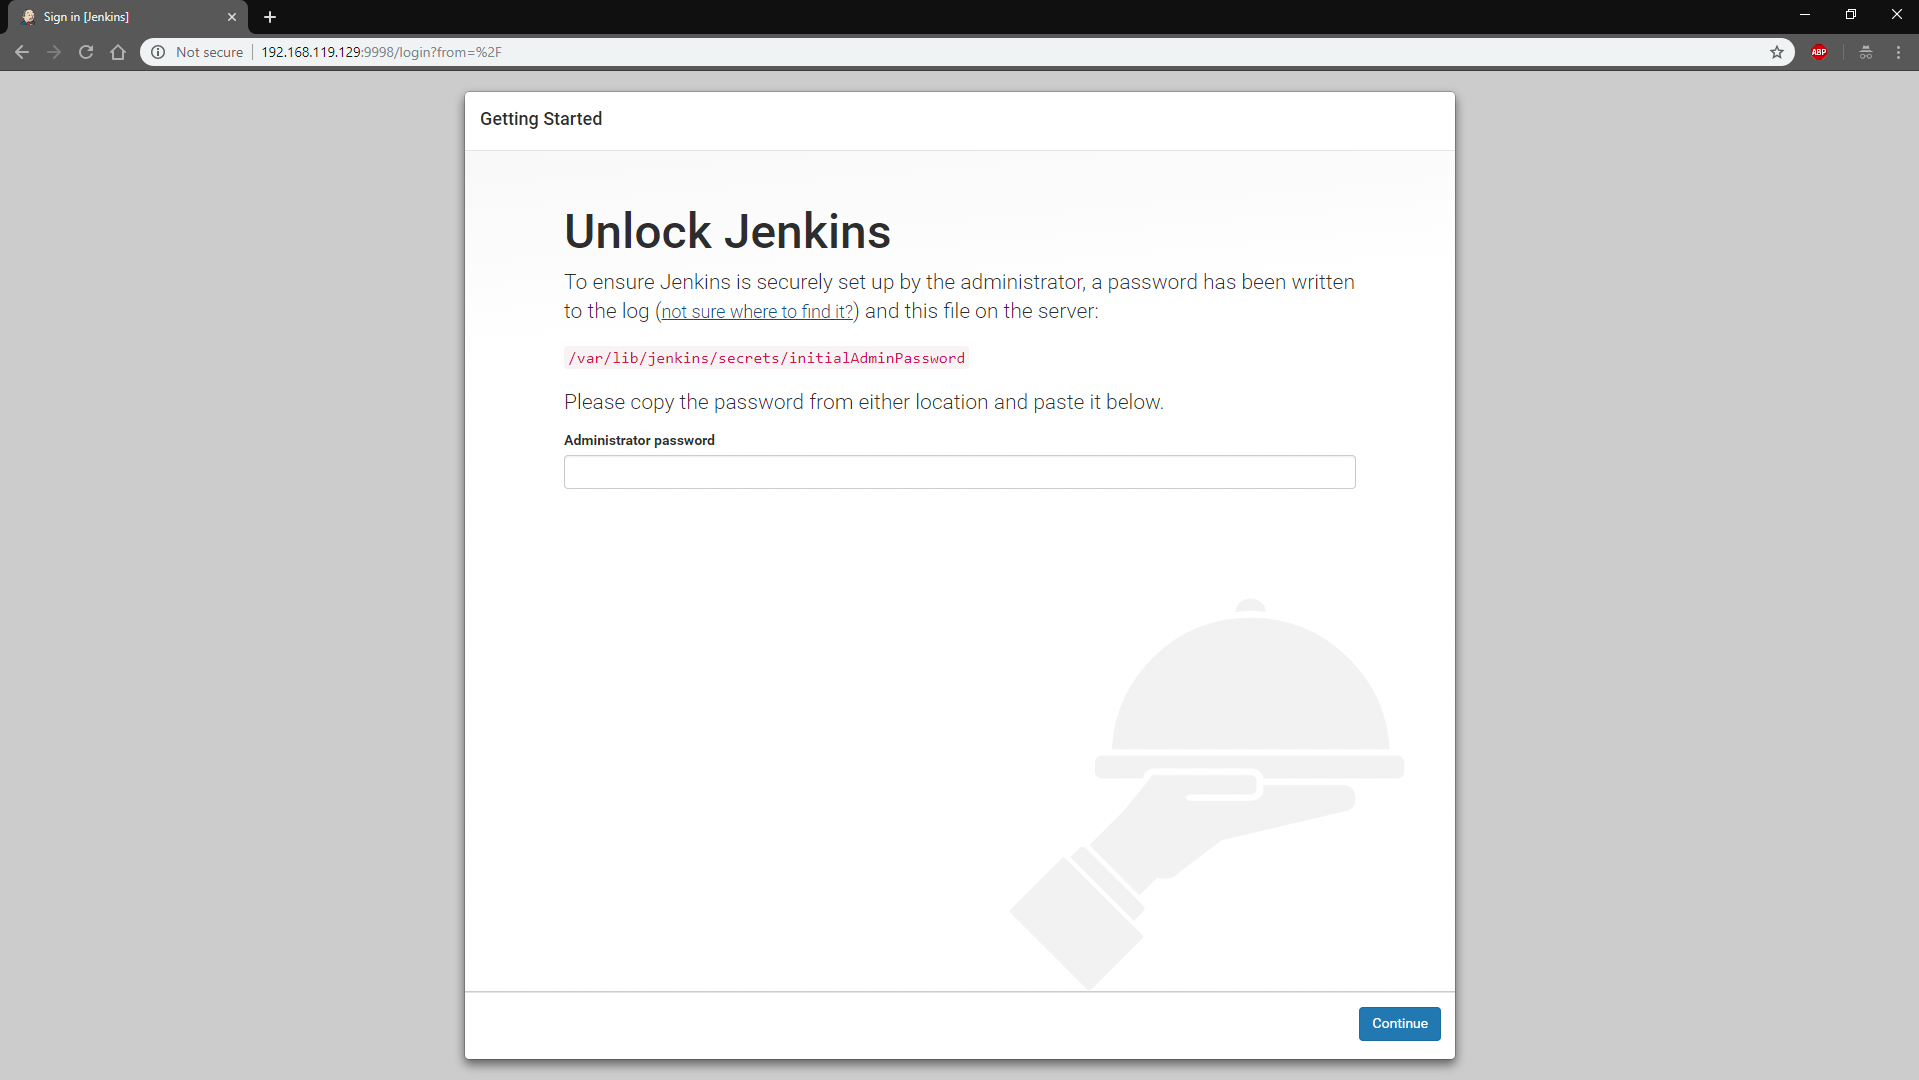
Afterthat, go to that file and paste in that input, we’re going to customize the Jenkins. Oops… almost forgot. The password is here: “/var/lib/jenkins/secrets/initialAdminPassword”. After that, we must choose between two options:
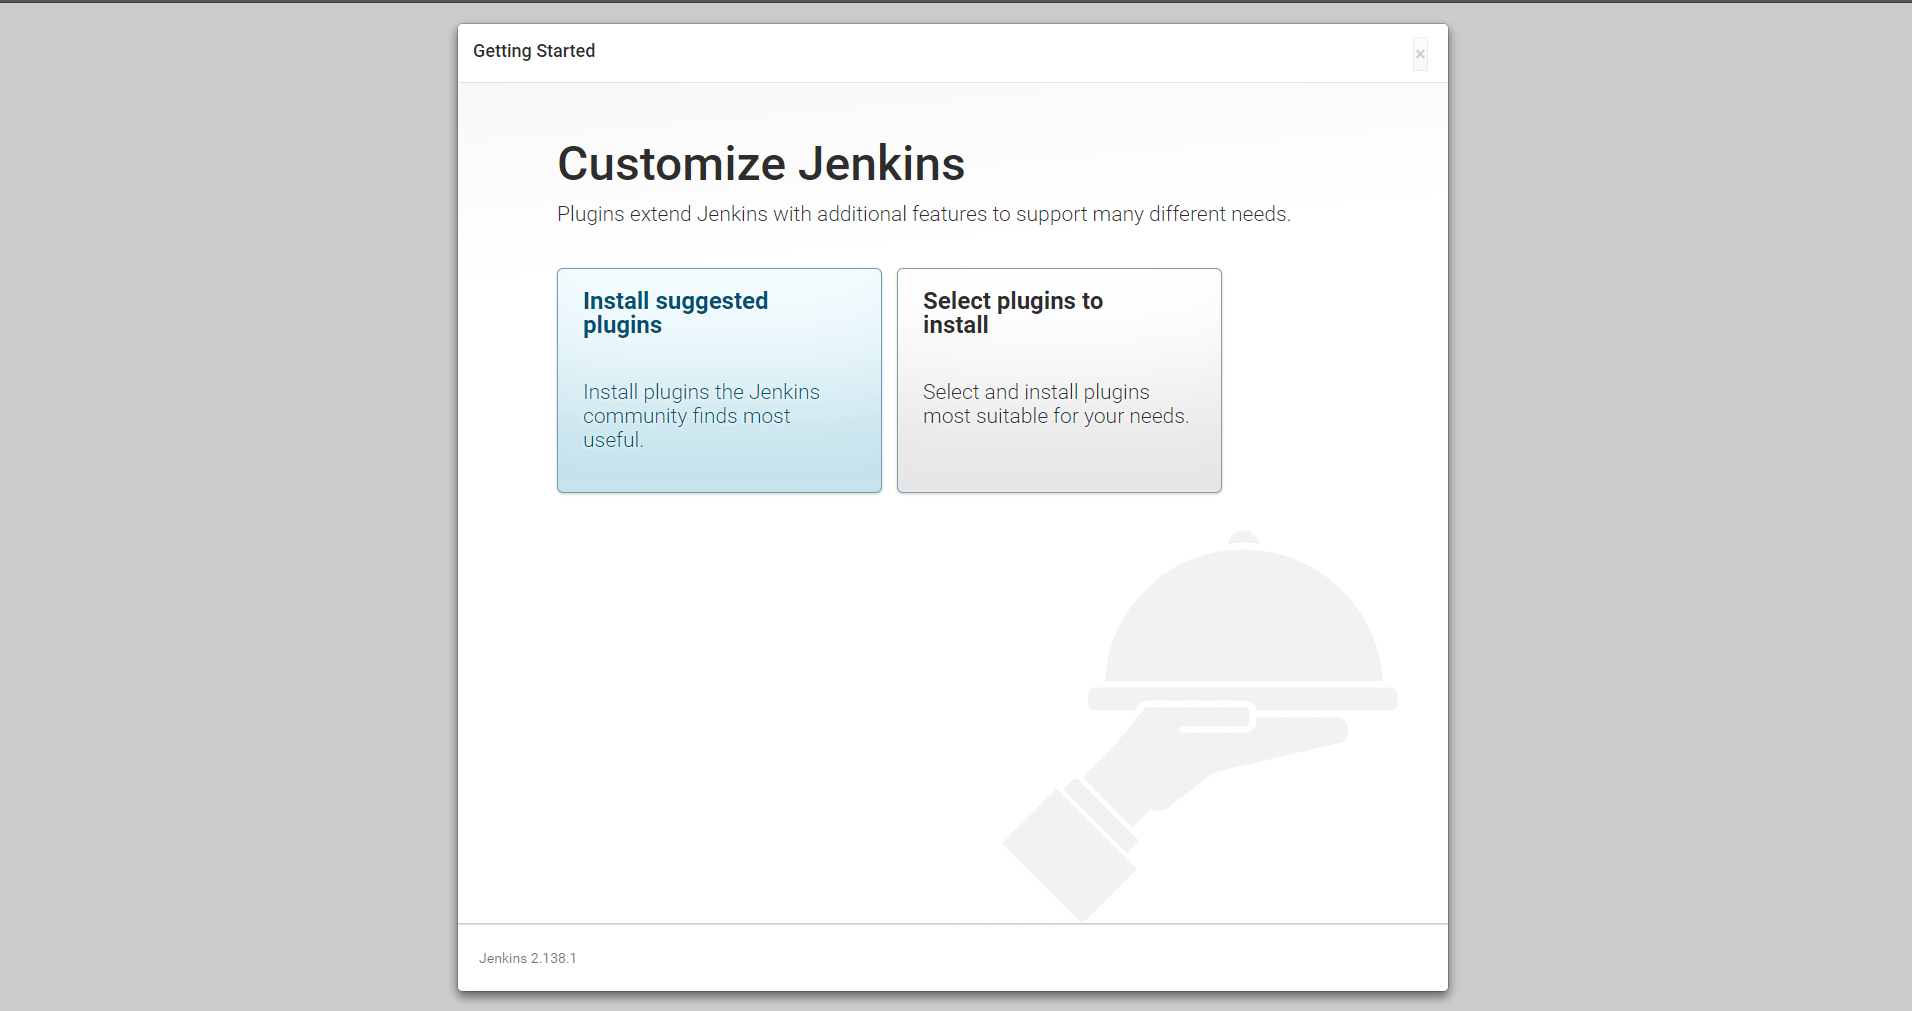
I usually select the suggested option, but this time I’m going to try the other one. After clicking on it, you’re going to have the next window:
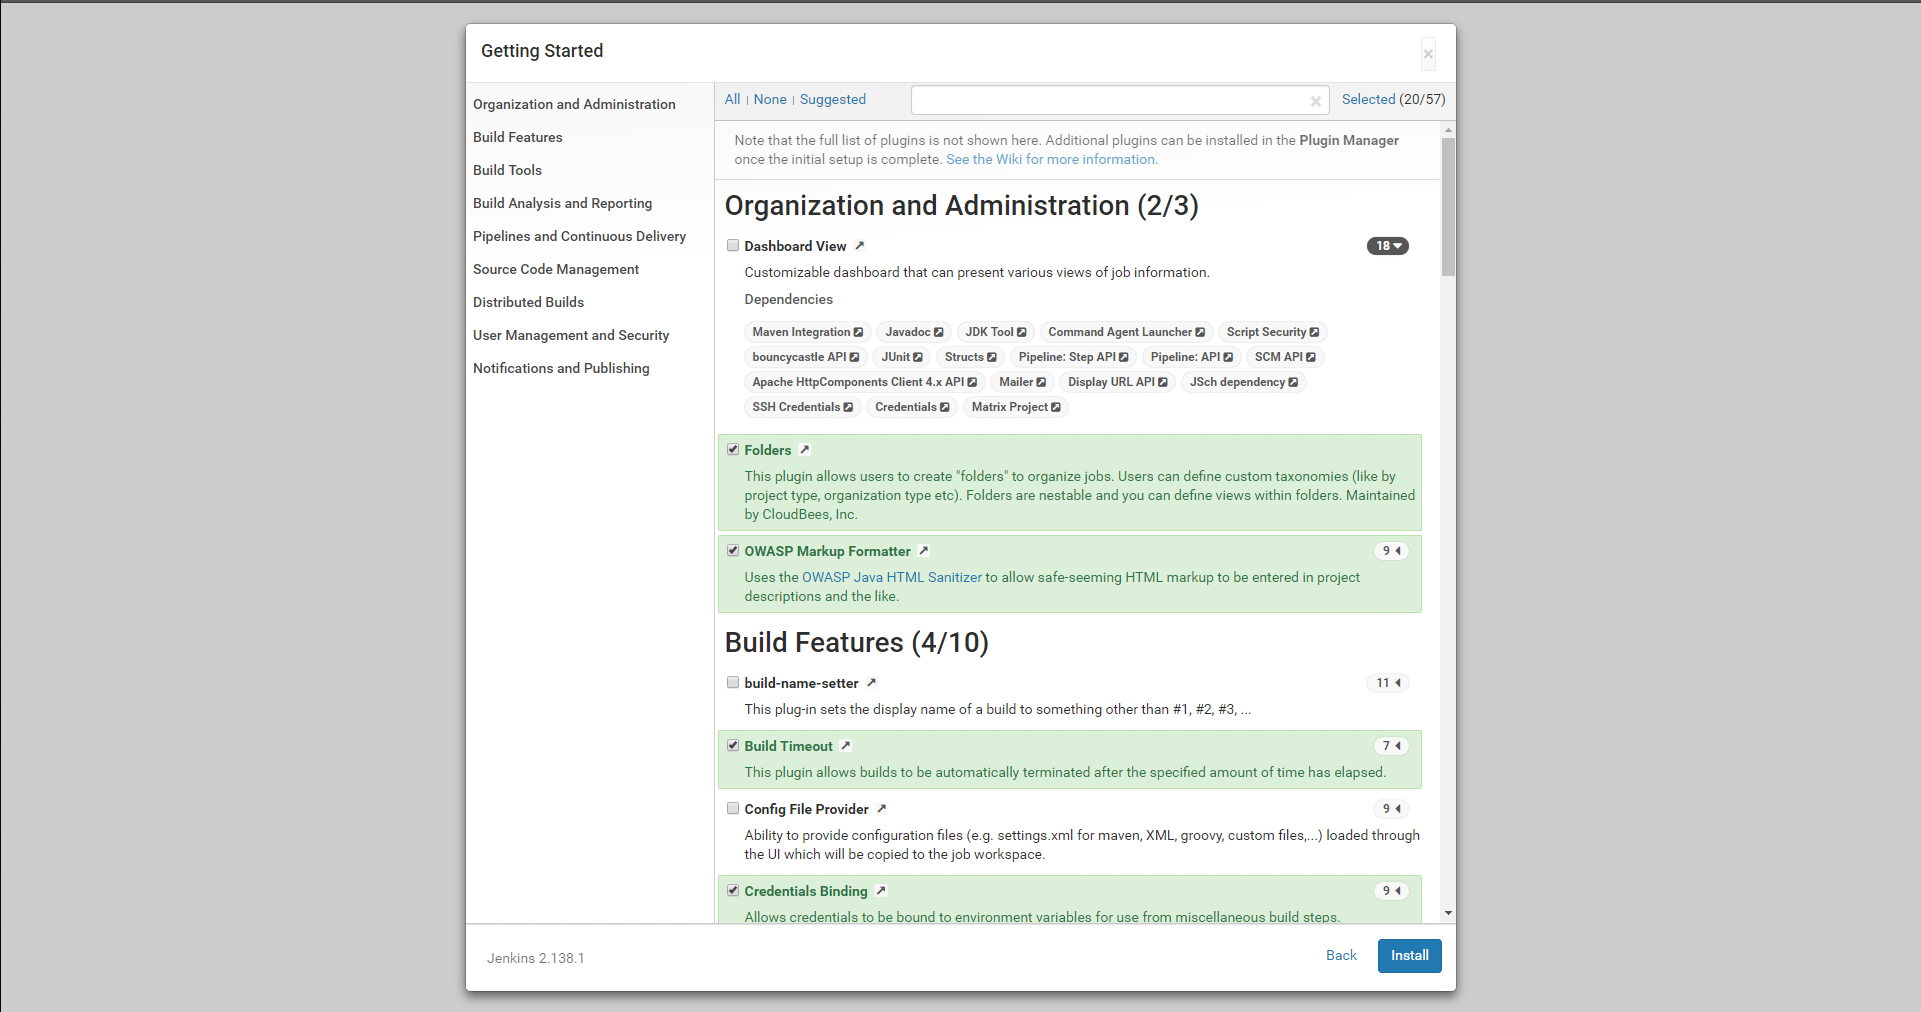
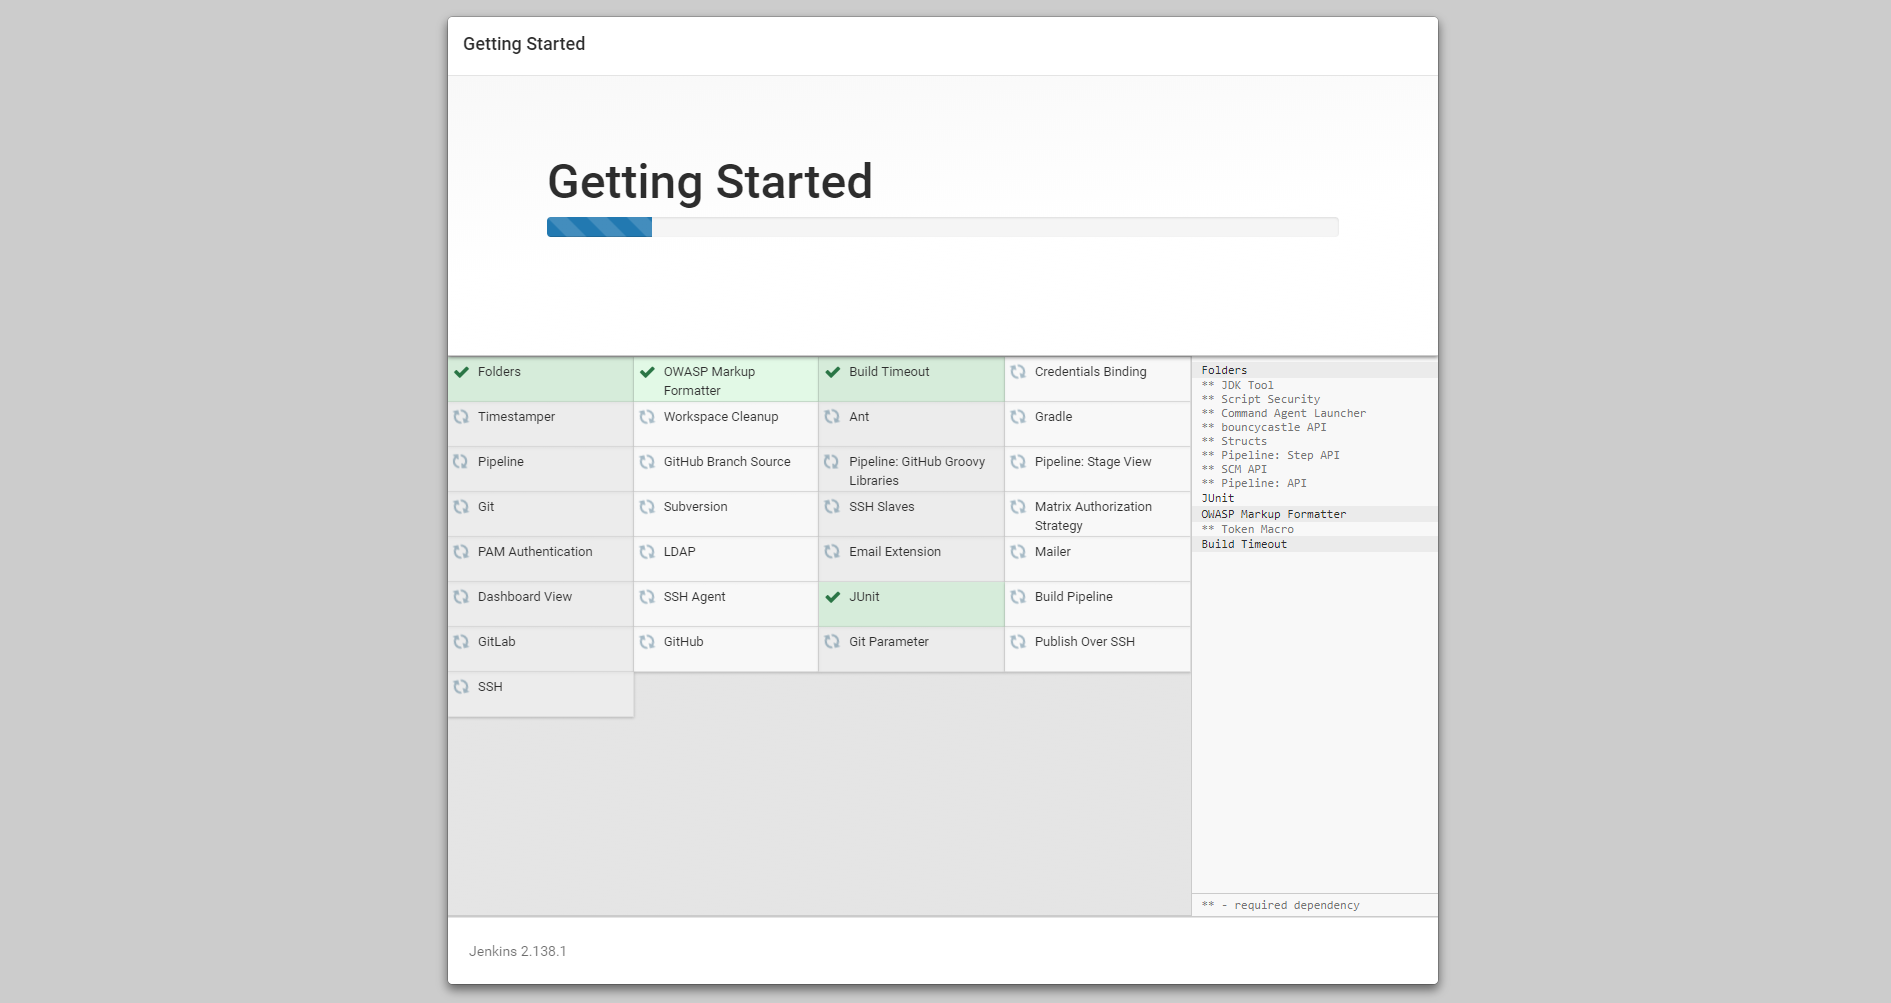
You can select all of them if you want or just read them all and select the ones you want. I installed the suggested ones, and I added some other ones, such as JUnit, Warnings, ssh plugins and all of the plugins from Git. One more thing, you can check all the dependencies for each plugin if you click on the number with the row. You can see this on the previous screenshot in the first plugin. When you’ve finished selecting all the plugins which you want to install, click on install and wait. You are going to have an installation screen, as you can see in the next screenshot:
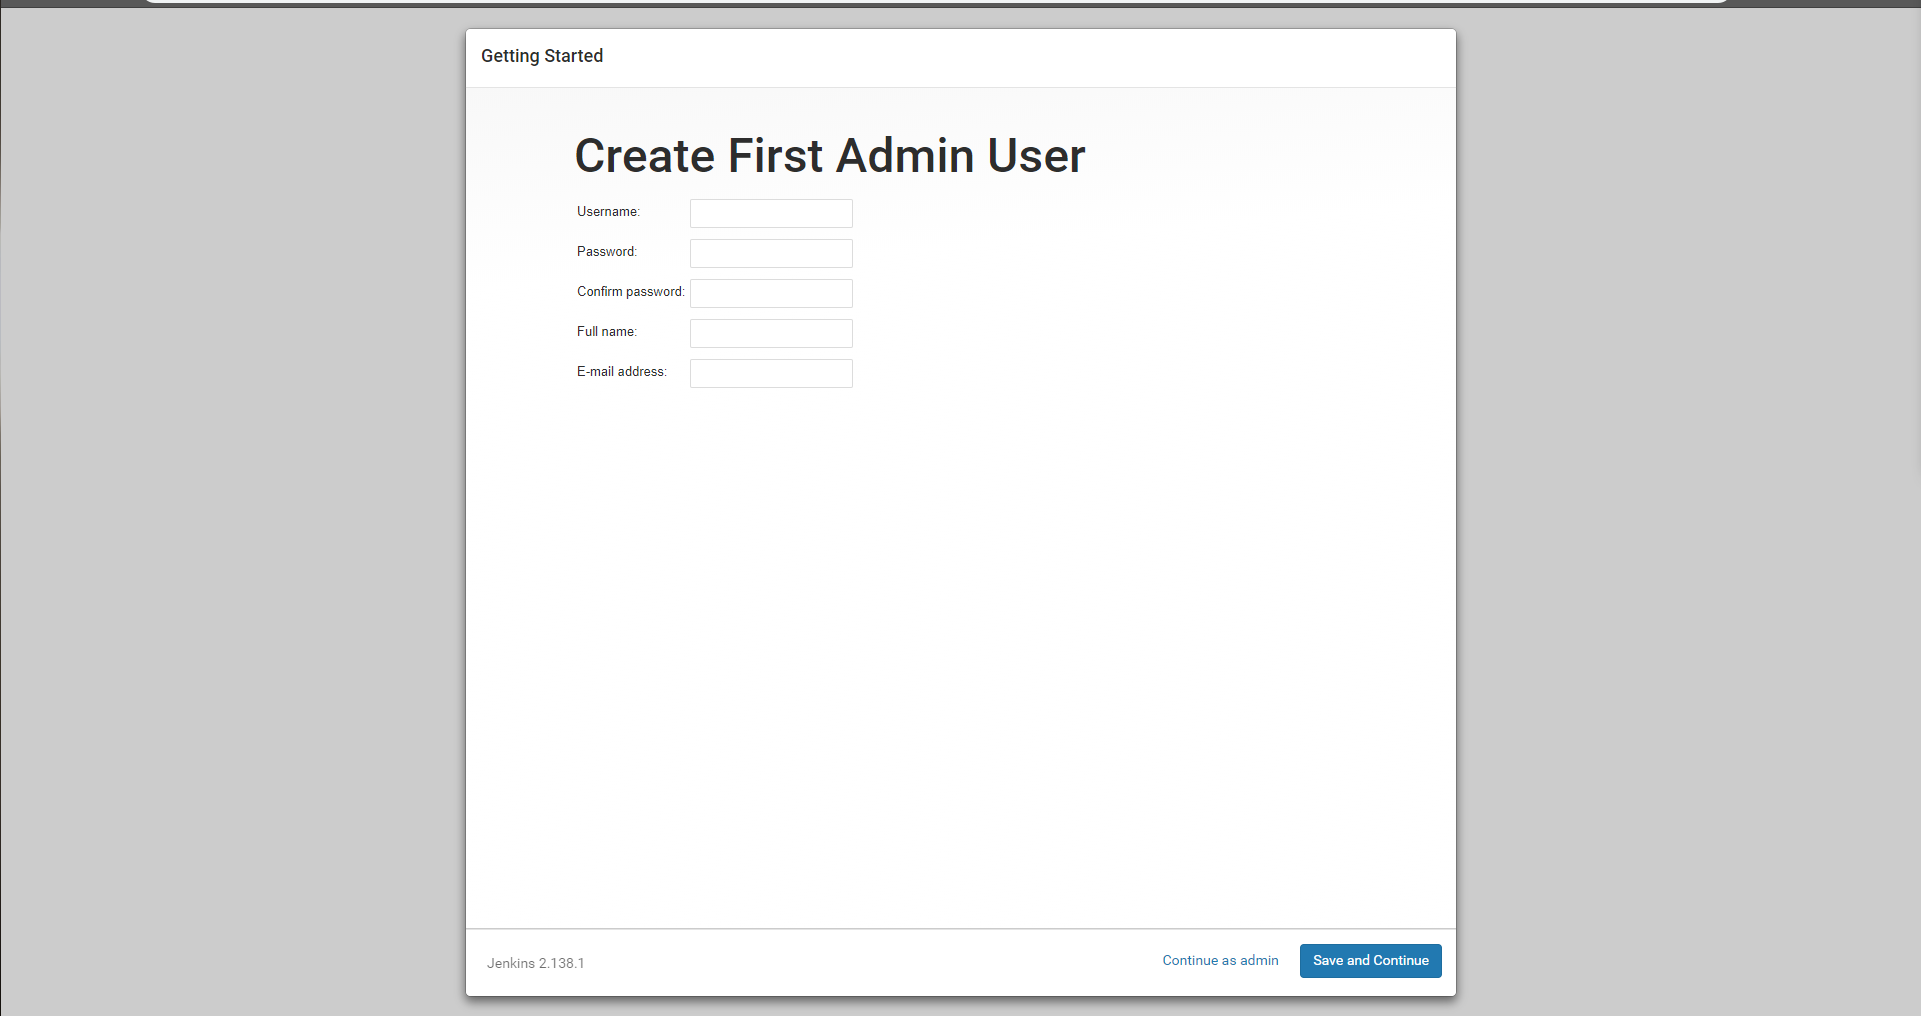
After that, you can add a user or just continue as admin. I recommend adding an Admin user.
After that, you have to decide the Jenkins URL that you want. You’re going to wonder why I need this. As this is a test server, I’m going to leave it like that, but in my own jenkins the URL is something like that https://myBarMan.jorgeancal.com:6669. After choosing the URL, you’re done with the installation, so enjoy your Jenkins!